If you’ve been listening to the podcasts or reading any of my web journal entries then you may already know that I’ve been playing D&D and RPG’s since I was 12 or so. That’s right at 25 years (last week was by Birthday) of gaming.
What you may not know yet is that within the last 8 years or so I’ve also gotten into playing poker. Texas Hold’em specifically. I got started right around the time that Chris Moneymaker won the World Series of Poker. I started watching the re-runs on ESPN and was hooked. I started a monthly game at my house and signed up for an account on Full Tilt Poker and Poker Stars.
I had been invited to play poker at a friend of a friend’s house and he had a fantastic poker table. I had bought a fold out one at Sears which was functional but this thing was in another league. I asked him where he had gotten it and he told me he had built it. Found the plans on the internet. Holy Crap! You can do that? Turns out you can.
I found the same plans and after a few trips to The Home Depot and Michaels’ craft stores I had a high-quality poker table. I learned a lot from that original build and had a lot of fun doing it. So how does this relate to D&D? Good question. Here’s the answer. I started thinking; Why don’t I build a table like this for my D&D games?
I did some internet searching and found this. The Avenger; the Ultimate Gaming Table. It was almost exactly what I had in mind. Seemed like it wouldn’t be too much more difficult than what I had already done so I started working on my version. Since I had just finished building a poker table I had one major adjustment in mind: a thick padded rail.
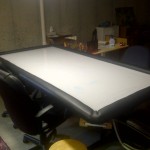
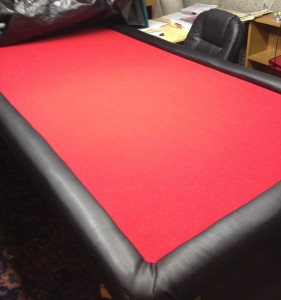
As you can see, I basically made a rectangular poker table. It’s got a 2″x 2″ foam padded rail around the whole table. It doesn’t show up well in this picture but I had a 1″ grid printed at Fedex Kinko’s which covers the entire playing surface area. I then laid down a sheet of clear vinyl purchased at wal-mart for $8.00 – by far the cheapest part of the whole project. I then secured the rail down on top of it (in the same fashion as a poker table) and now I have a 3’8″ x 7’8″ wet erase battle map!!!
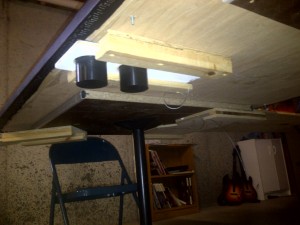
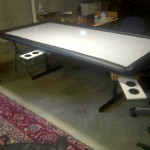 In this picture you can see that I also added pull out drink/dice/cup/misc holders. The original Avenger table used straps attached across the hole. I used premade cup holders. I got them for my poker table and they fit perfectly in the same hole you’d make with a door knob hole saw.
For the base, I got creative. I looked on Craigslist and found a sturdy table for sale and picked it up for $20.00 it was only 4′ long so I cut it in half and then spread the halves out evenly along the bottom. I then attached them with four 2.5″ wood screws.
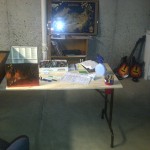 Ignore the clutter, but here you can see the detachable DM table I made. It has a fold out table leg on the right side and the left side rests onto a hidden shelf underneath the table. This allows me to have full view of the table in front of me and keep my notes, rolls and mini’s hidden from the players. You may also notice a sneak peek at the optional cover I made.
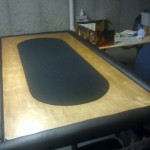 Since I still hold regular Poker games at my house as well as D&D games I made a poker table top for this table as well. It is just a 1/4″ plywood sheet with the oval cut out. The oval was covered in foam and fabric while the table top was stained. Both pieces have a foam cushion on the bottom so they don’t damage the vinyl underneath.
All in all I think it turned out great!! If there is any interest I may post detailed instructions on how to build your own Gaming Table.
As a bonus I’m attaching the PDF you would need to take to FedexKinko’s to get your grid printed. Ask for a Black&White version and it should only cost about $20.00 for a 4’x8′
EDIT: Now that my group has gone from playing with Maps & Mini’s I removed the grid and felted the entire top (and it helps reduce the ‘clicking’ of dice rolls for the podcast too . . .)
Please leave some comments and let me know if you’d like the more detailed instructions. Or if you live in the Cincinnati, Ohio area I could build one to your specifications – at a small profit, of course.
Thanks!!
– Michael, AKA Professor Mumbles
E-mail us at Podcast@TheRpgAcademy
Follow us on twitter @TheRpgAcademy
Visit our Facebook Page
Join our Google+ Community Page at: The RPG Academy
Support our show by becoming a Patron at www.Patreon.Com/TheRpgAcademy



5 pings